How to Deliver a Bowling Ball – Approach to Release
Bowling may seem to be a pretty darn simple game. You knock down pins, score points, trying to knock down as many pins as you can to get a good score. Simple enough right? So why is it so hard to knock down all those pins?
The fact is, it is difficult to throw a bowling ball consistently. More times than not, a new comer to bowling will get frustrated and eventually lose interest. Let’s face it, bowling is funner when you are hitting more pins. One of the biggest problems facing new bowlers (and even experienced ones) is developing a consistent set-up, approach and delivery. Also referred to as muscle memory, creating a consistent, dependable approach and delivery is the successful foundation of every good bowler. If you are new to bowling, learn the fundamentals first and you will find that you will progress quicker than most. Even for novices & pros, it is necessary at times to “go back to the basics” to straighten things out.
For this reason it is important to learn the basics of bowling from the footwork to the release of the bowling ball. Bowling Tutorials may help a person be more precise and exact with striking more pins. What you will discover is mostly all of them will dedicate a considerable amount of time on “The Delivery of the Ball”. Why? Because approach and delivery are the two most important fundamentals of bowling.
If you are able to consistently and accurately address and release the ball you will start hitting strikes more often. As in any sport, consistency must be practiced and it is very true in this sport as well – that is why you will often here other bowlers say, “bowling a game of repetition“. Equally, practice does not create a perfect bowling shot, perfect practice does. And this brings us to.
Finding a Good Bowling Coach
In any bowling alley you are likely going to find great bowlers, though great bowlers are not always great coaches. The best coaching at first should come from watching the better bowlers. Listen, analyze and apply what they are doing into your own bowling game. Believe me, you will have no problem finding someone to try to help your bowling game. If you are bowling to get better, any good bowler will be willing to help. The coach will find you, but at the same time be careful who you listen to.
You are you and you have your style, no doubt about it. A good coach will never try to change your style, but they will teach you the basic bowling techniques and apply them to your style. The art of a good coach being able to match proper technique with a unique style.. you. Below are some basic & common bowling lessons in an attempt to teach intermediate bowling techniques to anyone. Techniques that will help any person consistently “hit your mark”, resulting in hitting more pins, more often.
In this lesson below, I have broken down the entire bowling shot from picking up the ball to releasing the ball. Eliminating a lot of the variables that can create inconsistency, I have broken down the shot into 4 separate common steps that all good bowlers can work on: Picking up the Bowling Ball to Address, Your Pre-Shot Checklist, Delivering the Bowling Ball and Releasing the Bowling Ball
Picking up the Bowling Ball to Address
Be ready when it is your turn to bowl, pick up your ball* and walk towards your starting position. Stop on a consistent, pre-determined spot, (though this spot may change overtime or even during a game) and get into position.
This is referred to as your starting and/or address position. In most sports they have what they call an “athletic position” where an athlete finds a starting position that is center of gravity solid. Though in bowling this athletic position is a little different, the basics are the same… so in this case, this is where you get into your “bowling athletic position” and hold it while you go through your checklist described in step 2 below.
The exact spot you stand is very important, so you will want to line up at the same spot until you are consistent enough to adjust. There are marks on the lane to assist you with this. If you need help finding your starting spot, don’t be afraid to ask a better bowler in the alley. To help, find your spot and use the tip of your big to toe to align yourself on your spot. (right toe for righties, left toe for lefties) so you are always aware of where you are addressing your shot from.
Your Pre-Shot Checklist
Freeze… breath… relax. Now that you are in your solid, balanced, consistent, bowling athletic position, look up, find and concentrate on that precise mark you are aiming for on your lane. Freeze… breath… relax.
Do a short mental checklist of the basics: Ball Position: Is the ball to the side of your body and not out in front**? Shoulders: Are your shoulders square to the lane? Thinking: Focus on a smooth approach and delivery, hitting your mark. The idea here is to simply make sure everthing is in the right position before your start your first step.
The “pre-shot checklist” you come up with may be different from other bowlers, over time you will discover what works best for you. For some bowlers it may be as simple as taking a deep breath and saying something to themselves like “find your smooth“. Find what works best for you and use it to become a more consistent bowler.
Visualize the ball going exactly where you want it and move to Step 3 below. The more you practice this, the shorter the time it will take you from approach to delivery.
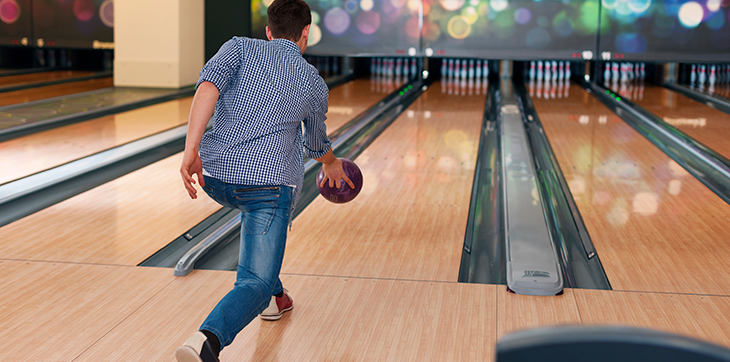
Delivering the Bowling Ball
Once you have completed your mental pre-shot checklist, you are ready for launch! One last time relax, breath in – breath out – relax. (In an effort to take away any tension and pressure in your body that could affect your ball delivery.)
Though not always true, but most commonly if a person is right handed, they would use their right foot as their first step and a left handed bowler would use their left foot. These positions are to favor the strong side of the body so that you can deliver the ball comfortably. So find what is most comfortable for you, you will be using this approach always.
As you are learning your approach, it also important to understand that there are bowlers that take 3 step, 4 step and even 5 step approaches. How many steps you take is more about your mechanics and style to create a smooth and consistent delivery of the ball.
Using a 4 step technique, (but the motion is true no matter how many steps) on your first step, holding your bowling ball away from your body and to the side, make a consistent out motion directly down the line of your mark. This push out should coincide with your first step.
Then on your second step, (continuing into your third step) take a smooth down movement with the ball, again keeping the ball directly on the line of your shot. This out and down may be more or less, depending on your style. Some bowlers will use the out motion to generate more speed. The most important part is that you are consistent, using your arm is more as a pendulum.
Your fourth step, the ball should now be starting on its way down and towards your shot. Your left foot will be planted and your arm will follow through till release.
Think of your entire body (shoulders, hips, feet) as going straight down a set of rail road tacks, (you can use the boards on the bowling lane as the track). Your shoulders, hips and feet need to all be square with the foul line and remain on your set of rail road tracks. Doing this, as well as keeping your ball and arm motion in a direct line with the track, will keep your shot going straight down your release line to your mark.
Releasing the Bowling Ball
Releasing the bowling ball is where everything comes together. How you release the ball depends on the amount of hook you want to achieve. Though there may be several ways to release the ball, one thing will always be consistent.. do not grip the ball. Most of the grip pressure will be with the pads of your bowling fingers with almost no pressure.
Applying the right amount of (little) pressure allows the thumb to come out of the ball first, slightly before your fingers. Using a very light grip pressure with your thumb, keep your the thumb in the ball straight with no knuckle-bend to allow a quick and smooth exiting of the thumb from your bowling ball. You almost want to feel like the ball is floating in your hand through the entire swing until you release, having all the pressure then on your finger tips as the ball is releasing towards your mark.
Be sure to follow through on your shot. A good thing to think about is after the ball is released from your hand is to continue your arm swing straight out & up, keeping you hand as if you were getting ready to shake someone’s hand. If you are trying to hook the ball, remember it is the fingers and wrist that create the ball spin, not your arm.
When you have found yourself consistently hitting your mark, now you can adjust. You may have to move right, left, forward or backward so that the ball is hitting the pocket.
The biggest mistake people can make is to move your starting position when you are not hitting your mark in the first place. If you are not hitting your mark, moving around in most cases will only make things worse. Work on hitting your mark first before you adjust.
We always recommend you consult with a certified coach so you can sharpen your skills and develop a smooth bowling release. We hope these tips help!
* It is always best to use two hands when picking up a bowling ball to reduce strain on your wrist and elbow.
** It is not advisable to position the ball in the center of the body; it is better if the ball is held your side. This will make it easier for you to execute a straight, consistent arm swing.
